
Product
8 min read
–
Jan 13, 2023
A practical guide to use and install Komiser
Want to take control of your cloud resources once and for all? Follow along to deploy Komiser in no time. Choose a deployment method and you are on your way!

Komiser is an open-source cloud-agnostic resource manager. It integrates with multiple cloud providers (including AWS, OCI, DigitalOcean, and CIVO), builds a cloud asset inventory, and helps you break down your cost at the resource level.
In the world of Komiser we have two universes, one pre-v3 and another one post-Komiser v3. This installation guide is applicable to any version v3.0.0 onwards. Komiser natively supports multiple cloud providers and cloud accounts using the config.toml file.Authentication is done using the "config.toml" file. When the Komiser executable is run it will look for the file in the current directory, if you have the config file somewhere else then you can pass in the "--config /path/to/config.toml" flag.
To find more in-depth installation guides and instructions check out the official Komiser documentation here.
Methods of deployment
- Running Komiser locally
- Running Komiser as a Docker container
- Running Komiser on a Kubernetes cluster
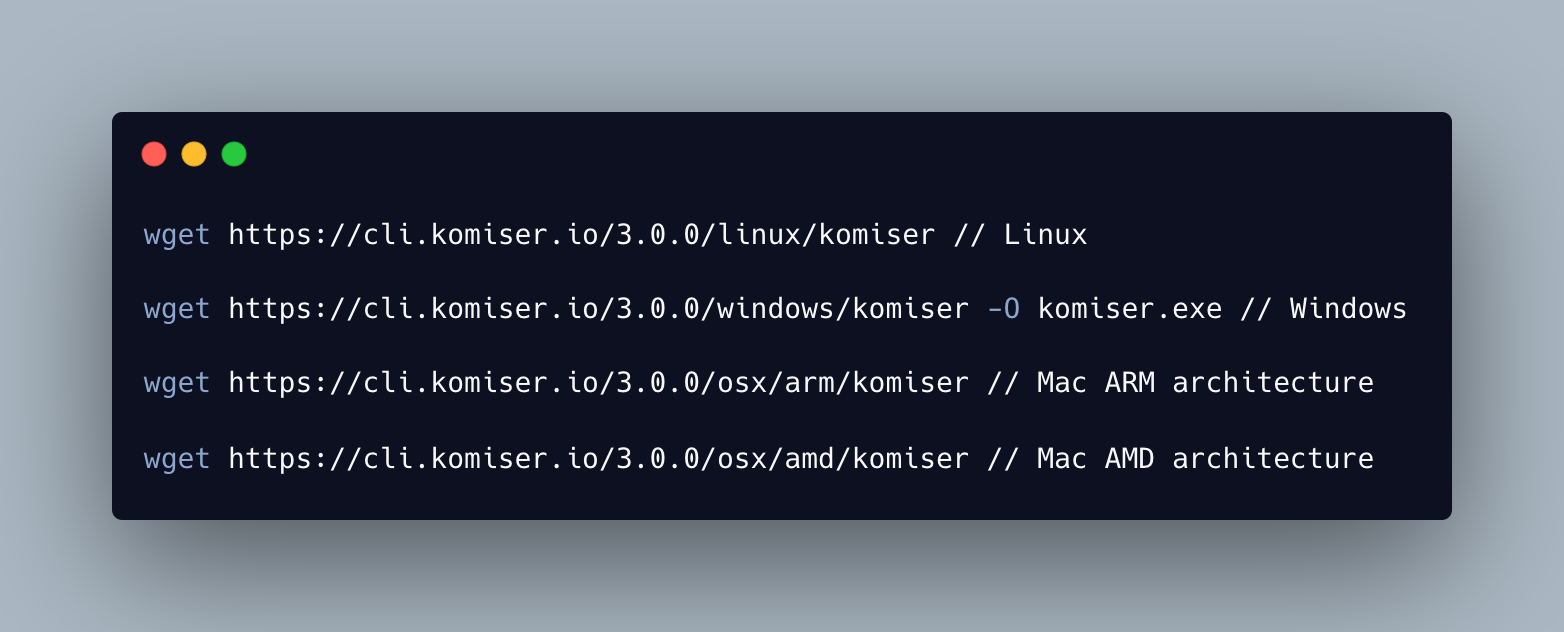
Running Komiser locally
Links to download install commands are here.
Alternatively, you can use Homebrew by running:

Step 1: Install Komiser using one of the commands above
Step 2: Create a config.toml file
Step 3: Choose your mode of persistence
Step 4: Run Komiser with the following command "komiser start"
Step 5: Access the dashboard from localhost:3000"
Remember if the config.toml file is in a different location to the directory you find yourself in you will have to use the —config /path/to/file flagRunning Komiser as a Docker container
Prerequisites: Installed Docker Desktop
Docker is a platform for developing, shipping, and running applications in containers. It allows developers to create and test applications in a consistent and reproducible environment, regardless of the underlying infrastructure. All dependencies are within the container making it self-sufficient. Komiser’s dependencies, mainly the configuration and credential files need to be mounted to the docker container as volumes.
To do so the -v flag in the docker run command is used to mount a volume for each file.
Step 1: Make sure the docker daemon is running in the background.
Step 2: Have your config.toml file and credential file (if applicable) ready.
Step 3: Edit the paths to the local path to your configuration files.
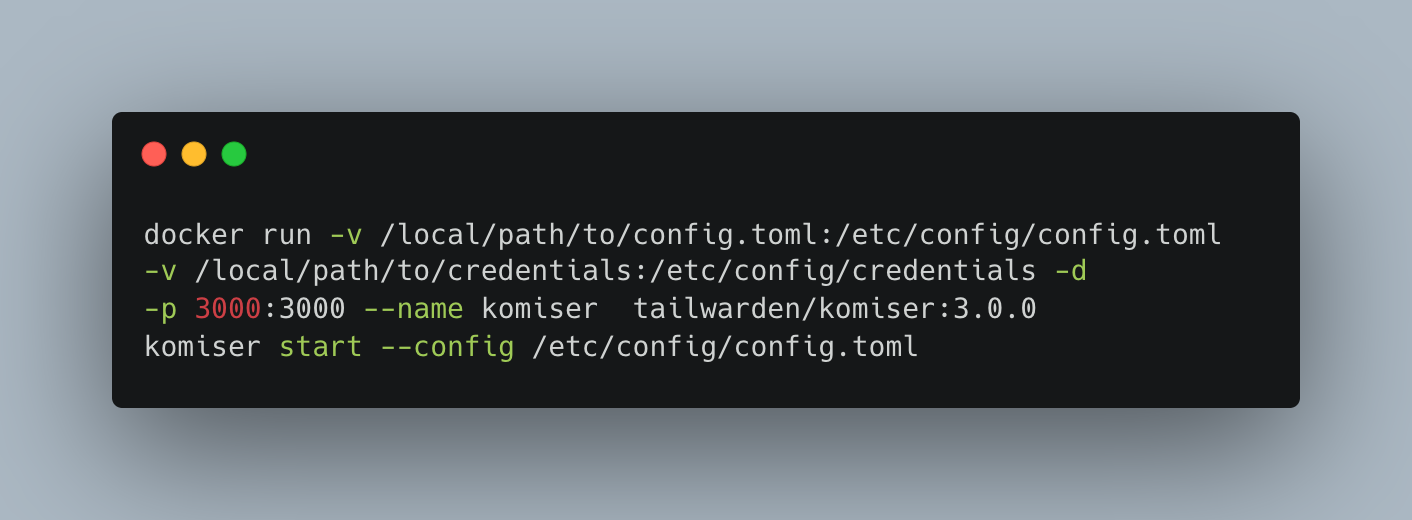
Step 4: Run the docker command
Step 5: Access the dashboard from localhost:3000
Here's a video tutorial on how to install Komiser using a Docker container:
Running Komiser in a Kubernetes cluster
Prerequisites: Access to a Kubernetes cluster, kubectl installed, Helm installed
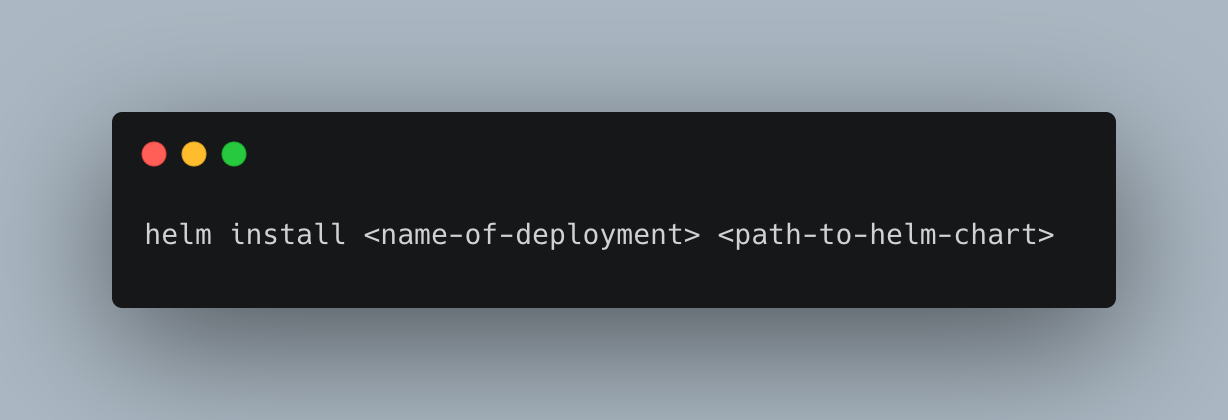
The easiest way to deploy Komiser to a Kubernetes cluster is by using the official Komiser Helm chart. Which is going to give you the templates to create the requisite Kubernetes object that we are going to need to run the deployment successfully. This helm chart can be deployed to any Kubernetes cluster but the resources used in the steps below will reference Amazon EKS.
Steps to deploy:
- Have kubectl access to a Kubernetes cluster with at least one working node.
- Create an IAM role that has the recommended Komiser permissions policy attached to it. Instructions to create IAM policy here. (AWS example)
- Clone the Helm chart repository
- The Kubernetes objects provisioned by the helm chart are the following:
- ServiceAccount
- ConfigMaps
- Deployment
- PersistentVolume
- PersistentVolumeClaim
- Service
The only changes you will have to make to the helm chart templates are to the ServiceAccount and to the config and credentials config maps. You might also want to customize the namespace you are deploying to. Default is testing-komiser- Create your config.toml file
- Choose your mode of data persistence

Once you’ve added your credentials, updated the ServiceAccount role ARN, and chosen your data persistence mode you are ready to deploy.
If you need any additional help follow along with me in the EKS installation video below:
Integrations
As mentioned, Komiser depends on the config.toml to authenticate to your cloud accounts, let’s take a look at an example:
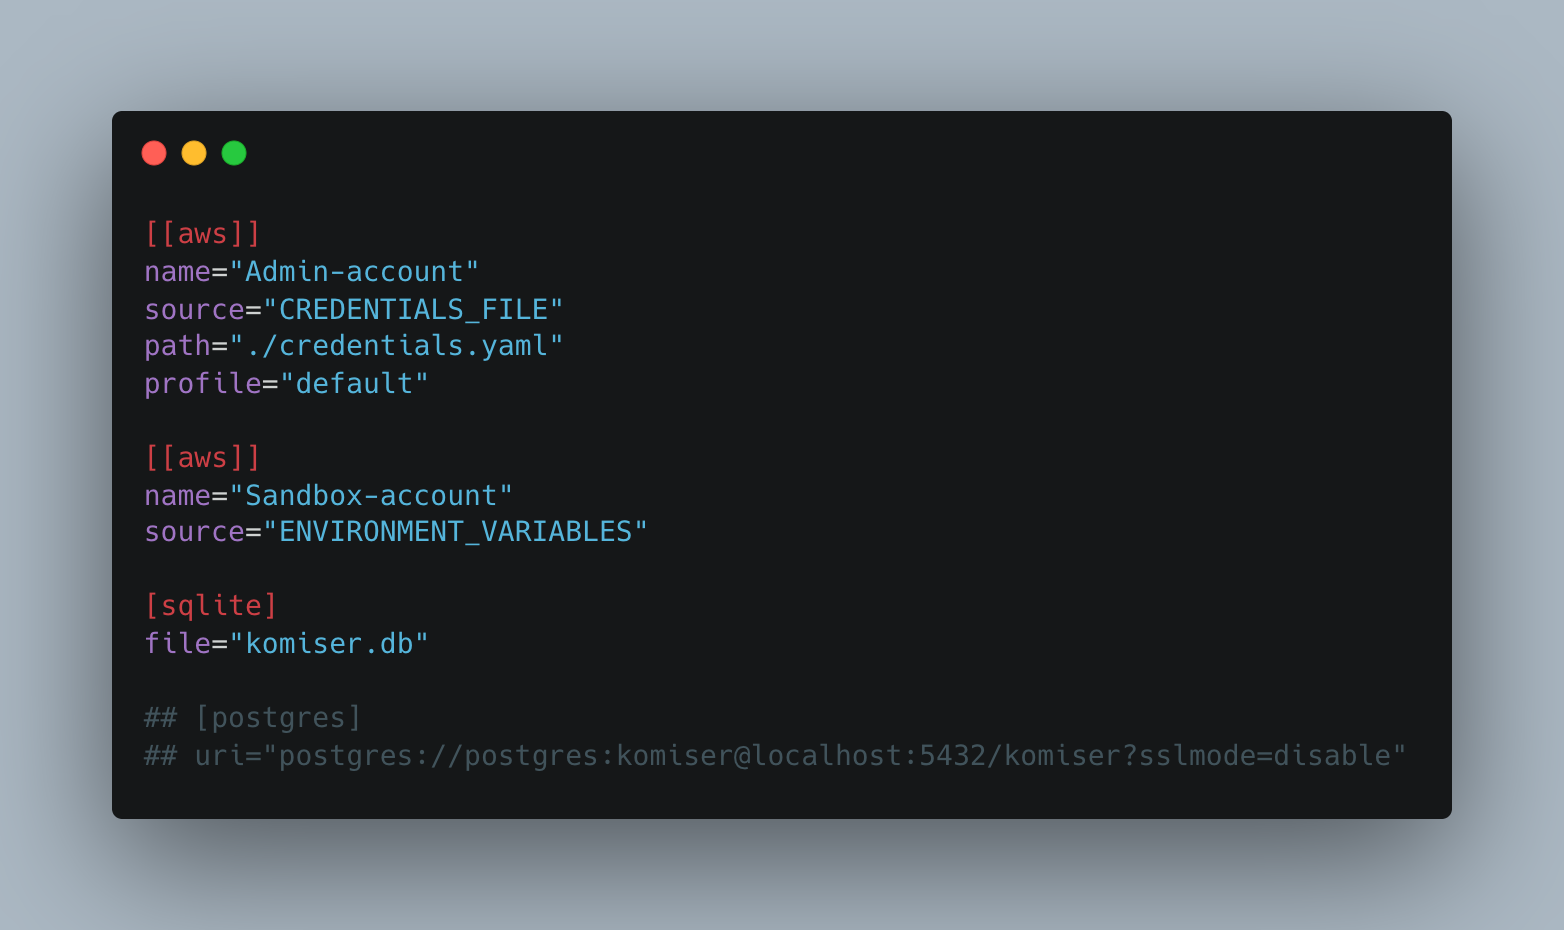
In the gist above we can see that we are connecting two AWS accounts and we are using both of the authentication methods that are available to us.
Authentication Methods
CREDENTIALS_FILE
We can use a credentials file similar to the one found in a local .aws folder. You will have to add a path to the credentials file relative to the config.toml file.
In the case of an AWS credentials file, it should look something like this:
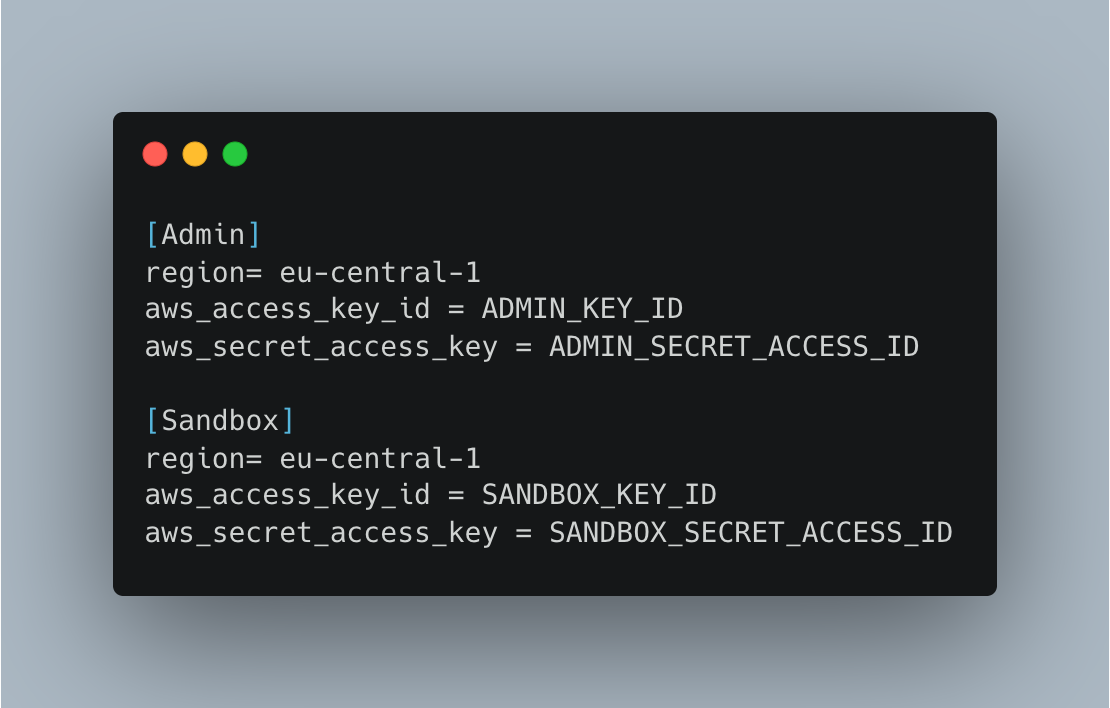
The name in brackets is the profile name and should be matched to the profile line in the config.toml file.
ENVIRONMENT_VARIABLES
Selecting "environmnet_variables" as the source instructs Komiser to retrieve the necessary authentication credentials from the locally exported environment variables on the machine. If you are experiencing difficulties, ensure that your exported credentials are correct by using the echo command to check their values.
Example: echo $AWS_ACCESS_KEY_ID
Modes of persistence
The configuration file allows you to include one of the data persistence methods. Persisting data is necessary to save and update custom views, decrease resource fetch time, and improve dashboard population after the initial deployment. The stored data can also be useful for local data exploration or building your own visualization dashboard with third-party tools (e.g: Grafana)
SQLite
Using the mode of persistence is likely the easiest method for saving your data. Simply choose where you want the .db file to be. It will be created at first launch, you don’t have to manually create the file.
In the screenshot above you can see the SQLite method being used.
Postgres
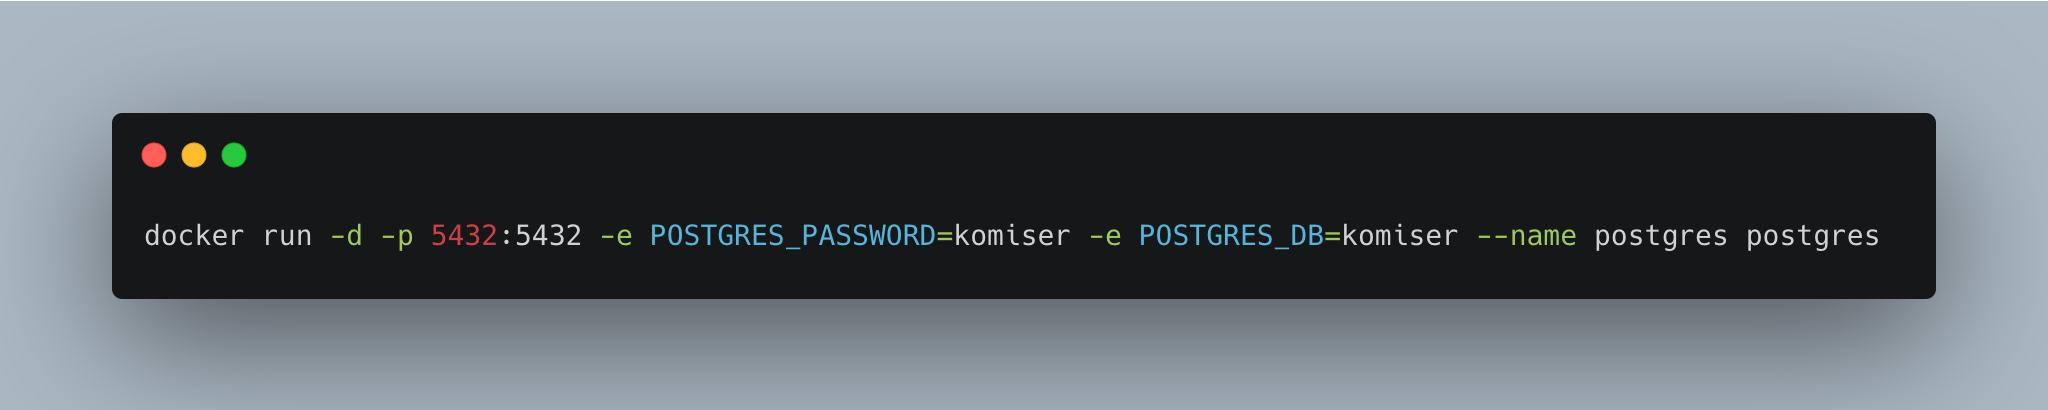
You can also run an external Postgres instance as a container (recommended) and attach it to Komiser.
Run a Postgres docker container with the following commands
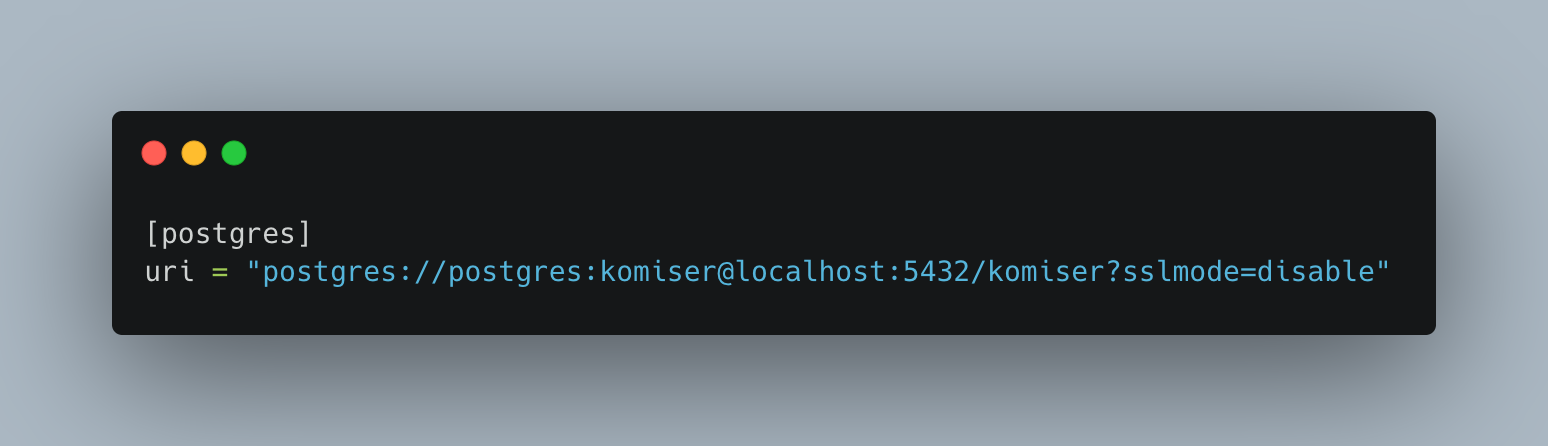
Update the config.toml file to include the Postgres connection URI as seen below
Troubleshooting
Komiser doesn’t have access to the config.toml file
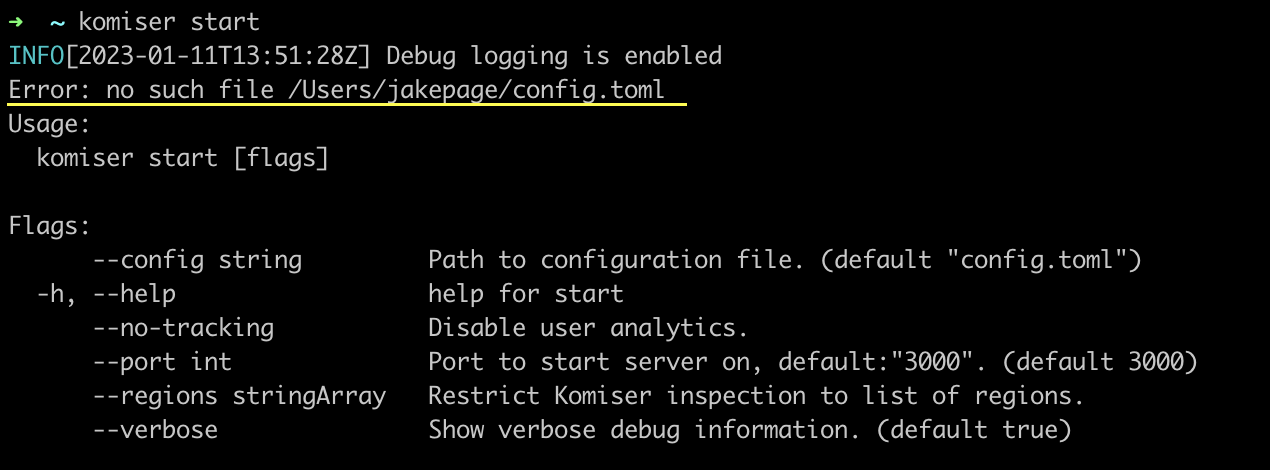
Komiser can’t find the configuration file, make sure the config.toml file is located in the same directory as the Komiser executable, if not that case, use the --config followed by the path to the configuration file.
A mode of persistence is missing
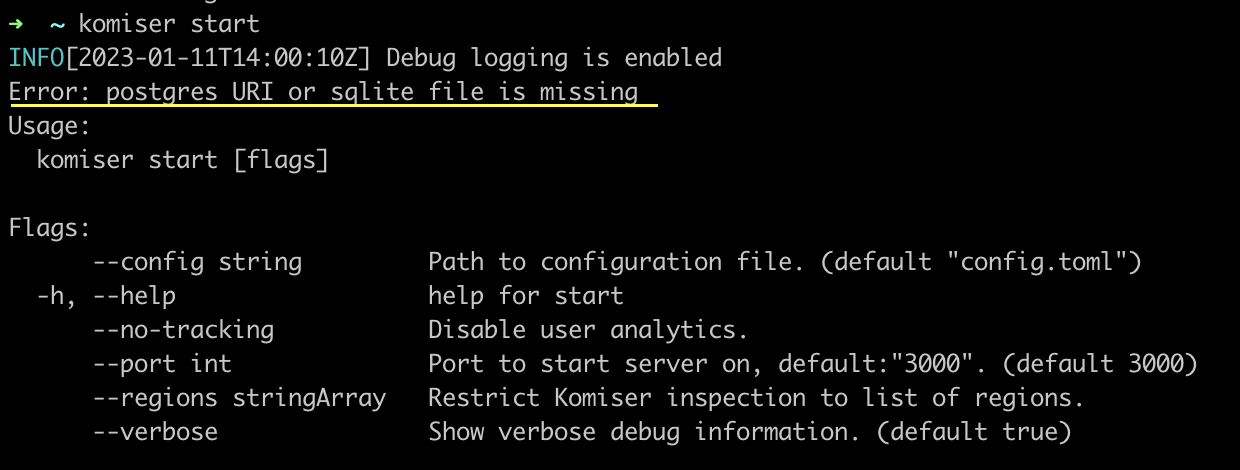
Make sure that you have correctly added your persistence mode in the config.toml file.
A port is already in use
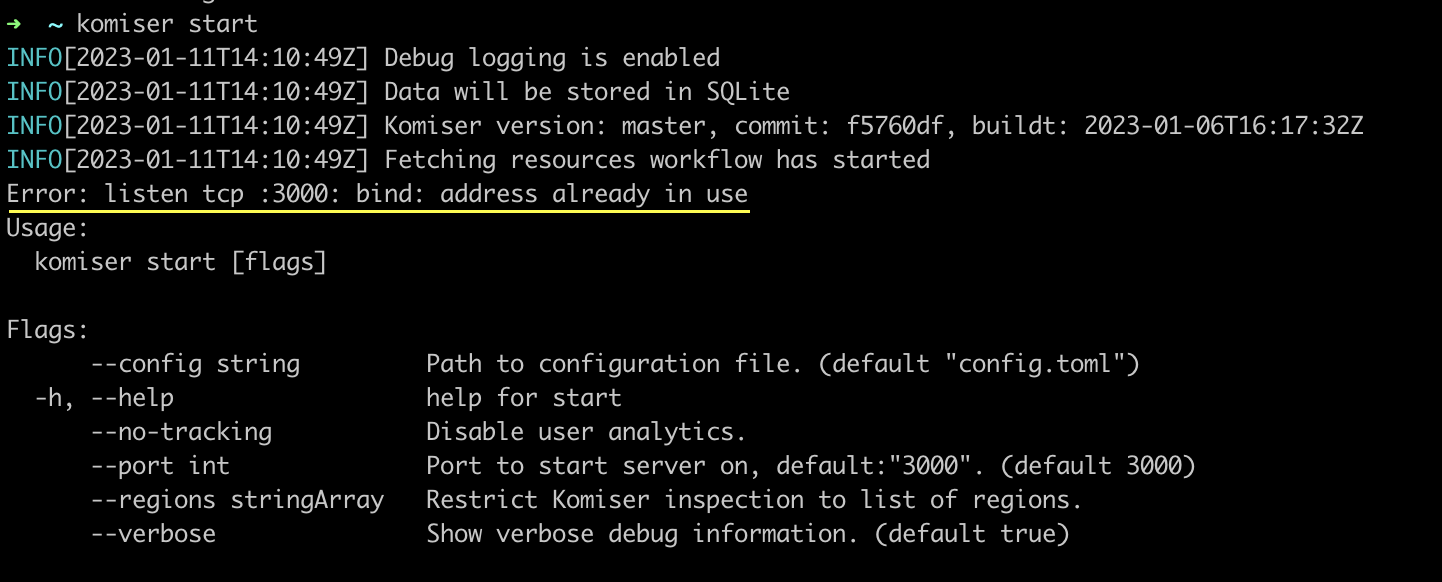
In this case, there is a live process currently bound to port 3000 you can inspect the live processes running and unbind them from the port. Alternatively, you can run Komiser passing in the --port flag and choose an available port binding.
SCP in your account is restricting Komiser access
We have seen instances of Komiser returning resource fetch issues when being deployed to an environment with SCPs in place that restricts the action certain entities can perform in an AWS organization. What we would recommend in this case would be to use thlag to specify exactly which regions you would like to retrieve resources from. That way, you can make sure that you are only retrieving data from unrestricted regions.
Regardless if you are a Developer, DevOps, or Cloud engineer. Dealing with the cloud can be tough at times, especially on your own. If you are using Tailwarden or Komiser and want to share your thoughts doubts and insights with other cloud practitioners feel free to join our Tailwarden Discord Server. Where you will find tips, community calls, and much more.

